Clean Up
Open Blender and import your model.
Reposition
The first thing you'll see is that it's probably not correctly sized and positioned. Using the R (rotate) and G (grab) keys, place your object at the origin.
Be sure to apply everything by hitting Ctrl+A in the scene view and choose All Transforms.
Remove Unwanted Geometry
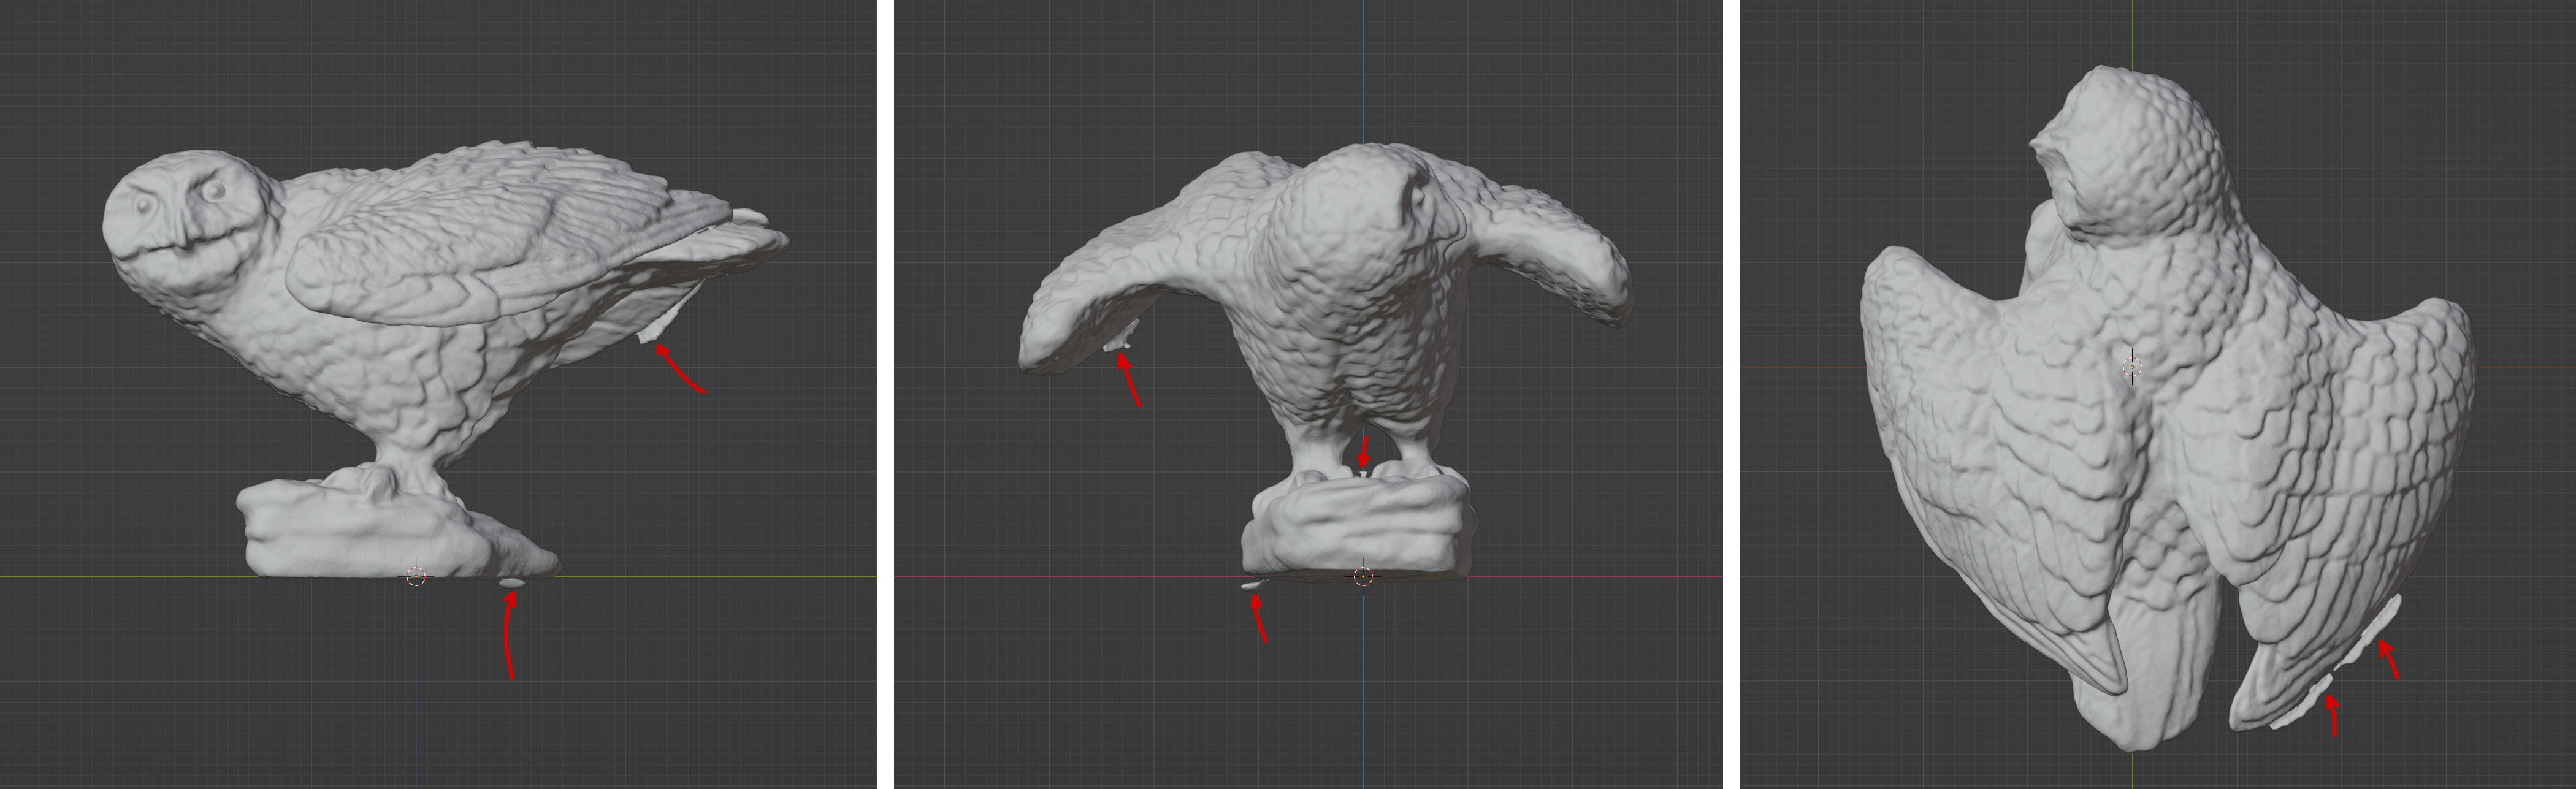
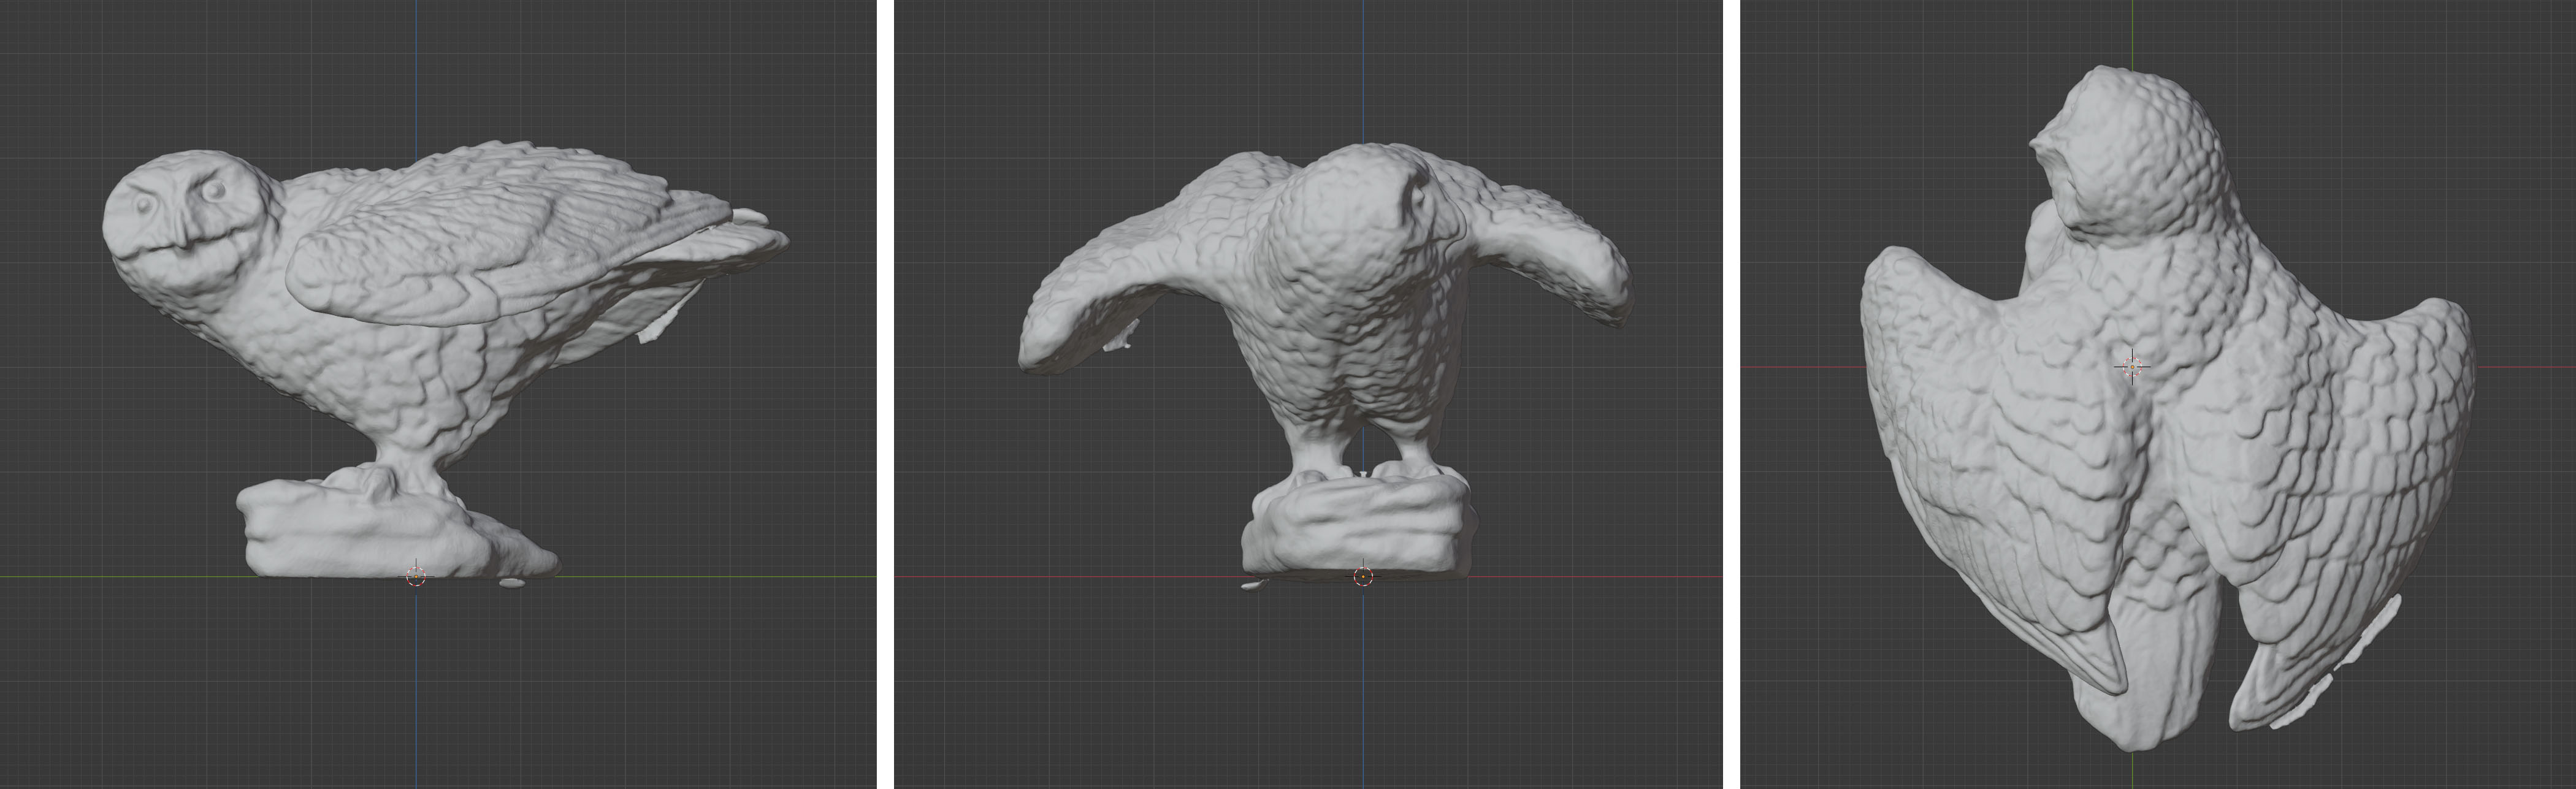
As you can see, our scan has a bunch of artifacts that aren't actually part of the owl. We're going to focus on the bottom part.
- Zoom in on the part you want to remove.
- Toggle X-Ray, so you can select occluded geometry, and hit
TABto enter Edit Mode. - In Edit Mode, hit
1and select the vertices you want to remove. - Hit
Xand select Delete Vertices - Press
2for edge selection, and select the boundary of the hole you've just created. HitFto create a face andCtrl+Tto triangulate it. - From Edit Mode, change into Sculpt Mode, select the Smooth tool, adjust the radius, and smoothen up the hole you've filled.
 Steps 1 to 6.
Repeat this for all the other parts that are unwanted in your scan.
Note
If you have free floating geometry that you want to quickly erase, do this:
- In Edit Mode, select a vertex of the part you want to keep.
- Hit
Ctrl+Lto select all linked vertices - Hit
Ctrl+Ito invert the selection. - Hit
Xand select Delete Vertices to delete all loose parts.
Decimate the Mesh
This step is optional, but 1.8mio triangles is hard to handle, so we'll decimate the mesh to 10% so we have something more light to work with. 180k triangles is still plenty enough, even later when we use it to bake in the details.
- Go back to object mode by hitting
TAB. - Go to the Modifier panel on the right hand side.
- Add a Decimate modifier.
- Set the Ratio to 0.1 (Blender will probably freeze for a few seconds).
- From the drop down, select Apply.
Finally, export the mesh as Wavefront (.obj) and name it hi-poly.obj.
Now that we have a good hi-poly mesh, let's continue with the next step, retopology.